Is your baking not turning out as expected? Are your cookies burnt on the bottom but still doughy in the middle? The culprit might be an improperly calibrated oven. Fortunately, calibrating your GE oven is a straightforward process that can significantly improve your baking and cooking results. Keep reading as Bilder Appliance Repair walks you through the steps to ensure your oven is accurately maintaining the temperature you set.
Why Oven Calibration Matters
Before diving into the how-to, it's important to understand why oven calibration is necessary. Over time, ovens can drift from their factory settings due to various factors, including wear and tear or fluctuations in voltage. This can lead to inconsistent cooking temperatures, which directly impacts the quality of your baked goods and meals. A properly calibrated oven ensures that the temperature displayed matches the actual temperature inside, giving you more control over your cooking.
How to Calibrate Your GE Oven
Most GE ovens allow you to adjust the temperature calibration up or down to compensate for any discrepancies. Here's a general guide; however, always refer to your specific GE oven model's user manual for the most accurate instructions, as button names and menu options can vary slightly.
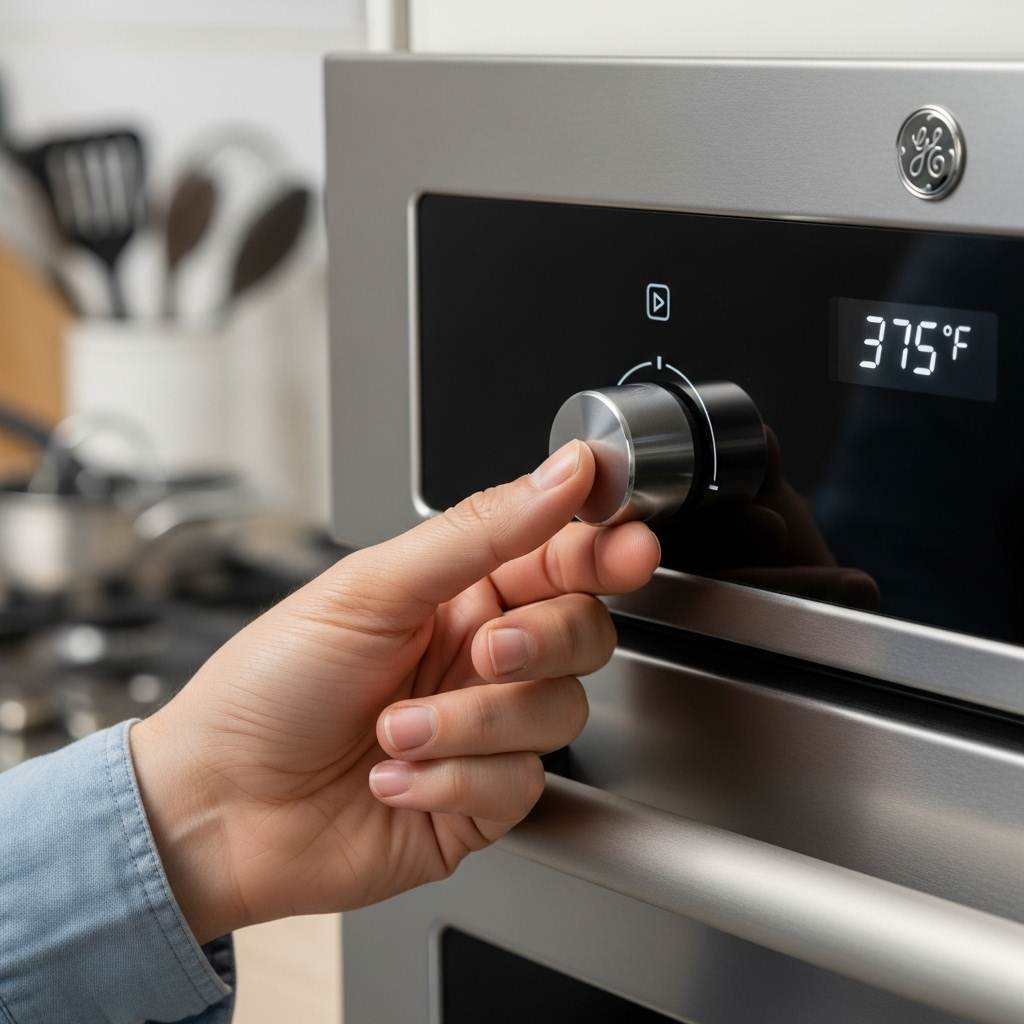
Enter Calibration Mode: Typically, this involves pressing and holding two buttons simultaneously for a few seconds. Common button combinations include "Bake" and "Broil," or "Timer" and "Delay Start." Your oven's manual will specify the correct combination for your model.
View the Current Offset: Once in calibration mode, the display will show the current temperature offset. This is usually a number between -35°F and +35°F (or the Celsius equivalent), indicating how much the oven temperature is set to deviate from the setpoint.
Adjust the Temperature: Use the up and down arrow keys, or the number pad, to adjust the temperature offset. If your oven is running too hot, decrease the offset. If it's running too cold, increase the offset. A good starting point is to adjust in 10-15 degree increments.
Confirm the Setting: Press the same two buttons you used to enter calibration mode to save the new setting. The oven will usually beep to confirm the change.
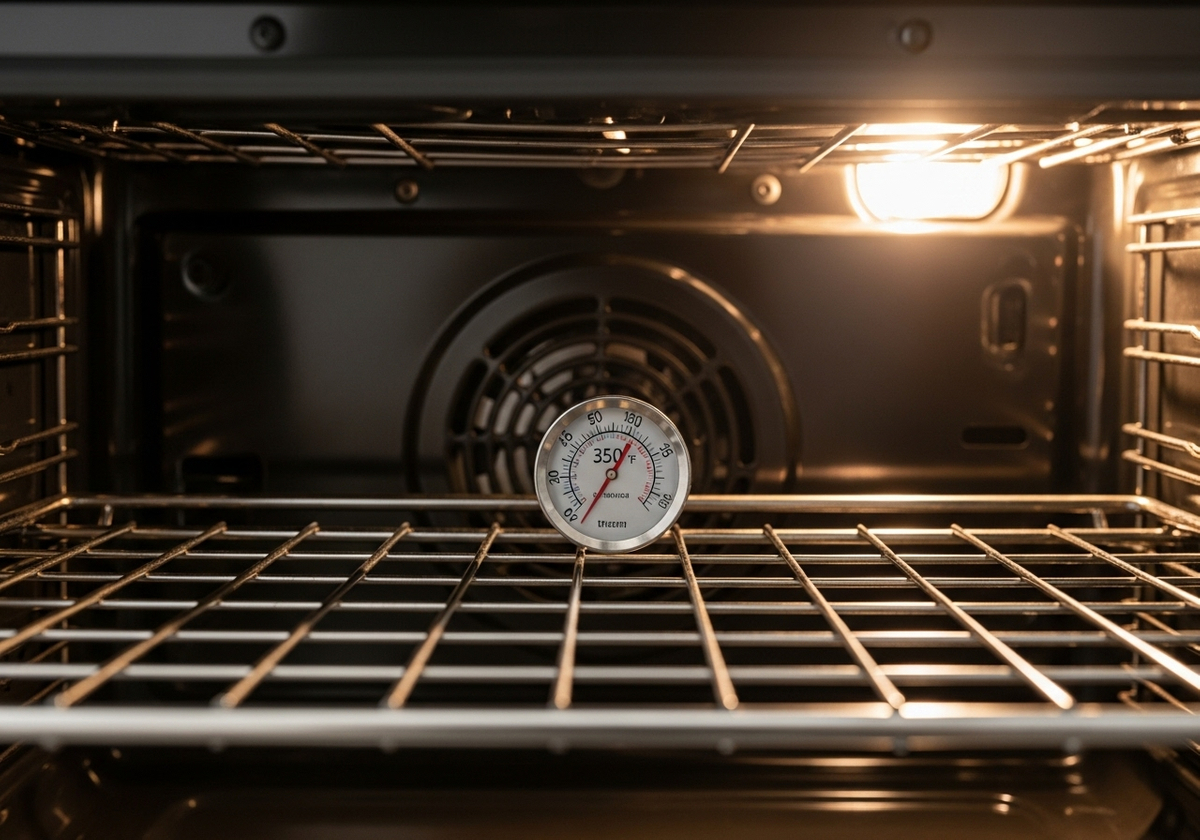
Test Your Calibration: After calibrating, it's crucial to test the accuracy of your oven. Use an oven thermometer placed in the center of the oven to verify the temperature. Preheat the oven to 350°F (175°C) and let it run for about 20 minutes. Compare the thermometer reading to the set temperature. If there's still a discrepancy, repeat the calibration process until the oven temperature matches the set temperature.
Tips for Accurate Calibration
Use an Oven Thermometer: Don't rely solely on your oven's display. An accurate oven thermometer is essential for verifying the actual temperature.
Give it Time: Allow your oven to preheat fully before testing the temperature. This ensures the temperature has stabilized.
Avoid Opening the Door: Opening the oven door during preheating or testing can disrupt the temperature and lead to inaccurate readings.
Consult Your Manual: Always refer to your GE oven's user manual for specific instructions and safety precautions.
Is your oven still not heating properly after calibration? It might be time to consider professional oven repair. Bilder Appliance Repair provides Minnesota, Colorado, and Wisconsin with professional appliance repair services. We're committed to providing reliable and trustworthy service to homeowners, property managers, and landlords. Contact us to learn more about our appliance repair services and how we can help you maintain your home appliances.